The $30 Tablet You Bought From Amazon Is Actually Amazing
This holiday season, Amazon rolled out predictable pricing on their line of Alexa powered devices. The best deal, from a hardware perspective, is the $29 tag on their 7″ tablet. The tablet itself has mixed reviews depending on what side of the net you’re on. Parents may find the deal incredibly suitable for their children and some find it a decent e-book reader, but most tech-centric followers understand the device’s limits. The 2019 model does address a number of hardware limitations that earlier revisions were bruised by, but let’s be honest, this isn’t a current generation iPad…
From where I stand, I see three things that everyone in the tech industry should be focusing on here:
1.) Price — $30! A burner phone in 2010 was three times that price.
2.) [Raw] Hardware — For $30 you get: Dual band Wi-Fi, Android powered board, a pretty decent 7″ capacitive touch screen, two cameras, a battery, a microSD slot, a headphone jack, a thin form factor, gyroscope, and so on. If you were to build a project using parts from the Arduino/Raspberry Pi ecosystem, a similar build to display content on a 7″ touch screen would easily cost more than $50-60 and lack the thin form factor and battery life this tablet features.
3.) Software — The Android powered board is actually pretty significant here, as this opens up the DIY/Maker/Dev potential. In addition, the fact that Alexa (always on) capabilities paired with the headphone jack makes this a direct replacement for a number of Amazon’s SKUs such as the Echo Dot and Echo Show lineup.
Many of you reading this likely know where I am headed with this and other articles out there do a decent job highlight some fun use cases, but here are a few just to get the idea machines running:
Smart Mirrors – Why use a Raspberry Pi and power hungry LCD/LED screen when a couple 7″ tablets strategically placed on the other side of the glass works just as well!
Alarm Clocks – Replace alarm clocks and smaller Echo Show devices with 7″ of screen size that can be propped up using any number of cell phone holders.
Photo Frame – Wi-Fi enabled photo frames of similar size are usually double the price and with less flexibility from an operating system and app lens.
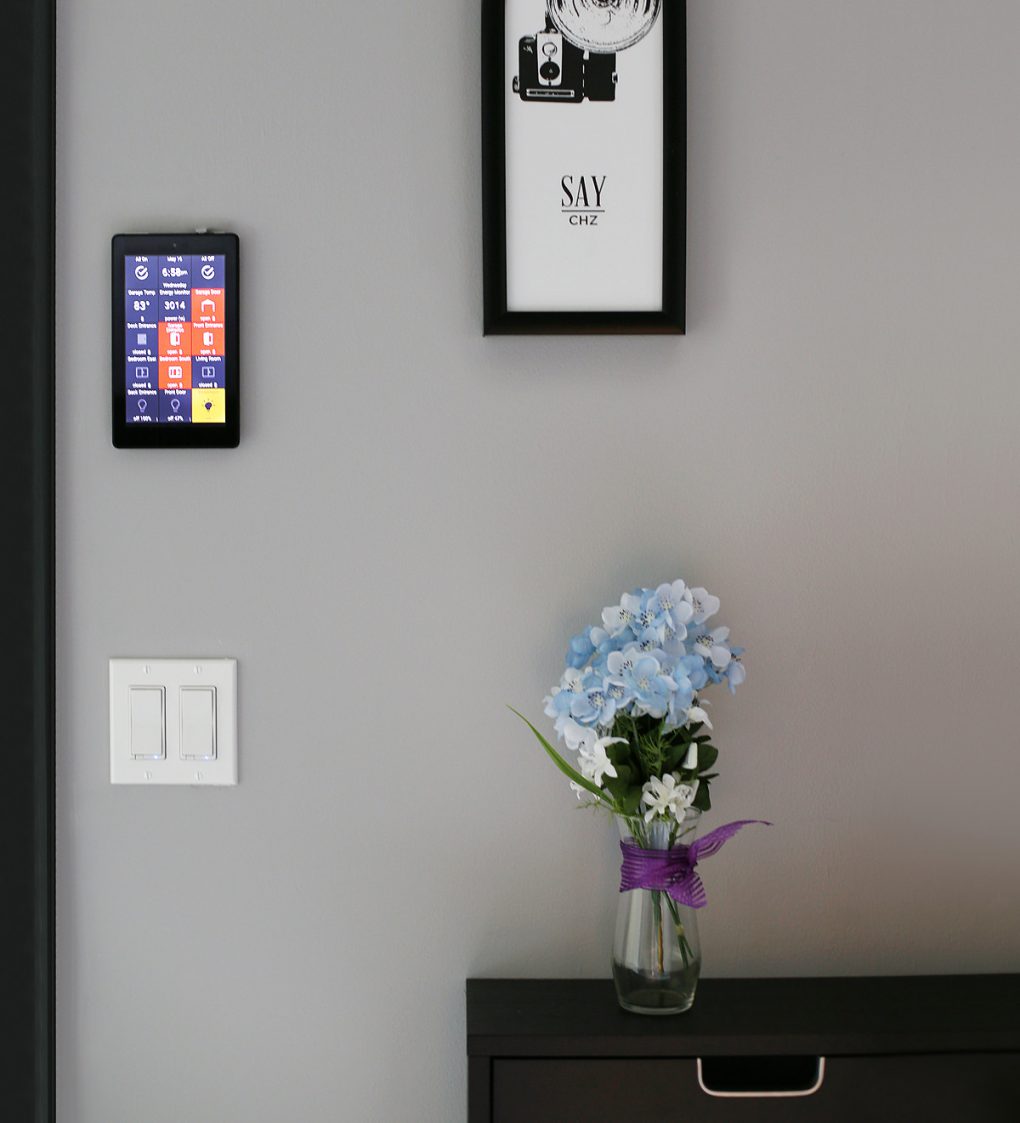
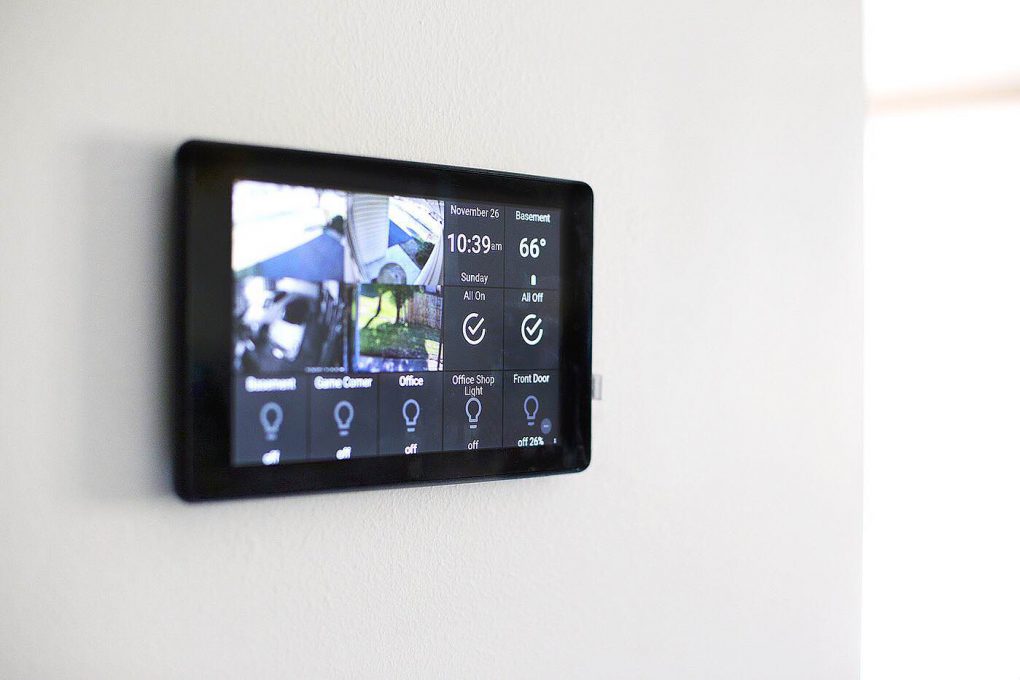
Most of the extended use cases for this tablet involve a degree of software modification. This article focuses on how to easily provision the tablet to be used for any project where a constant/always-on screen is needed. My favorite example of where these tablets really show their true power is in a smart home setting.
Garage entrance view so I can perform quick actions before leaving or entering the house. This view also allows me to see which doors or windows are open before leaving.
At $30, these tablets can be installed in every room without breaking the bank. Customize views to accommodate the rooms they are in.
Amazon Fire Tablet Kioskification Procedure
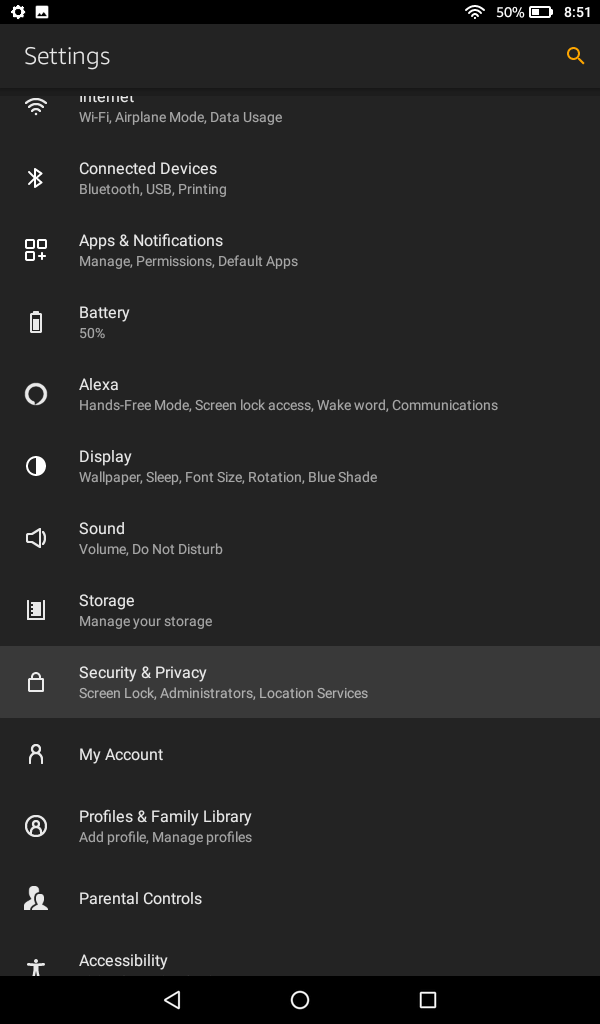
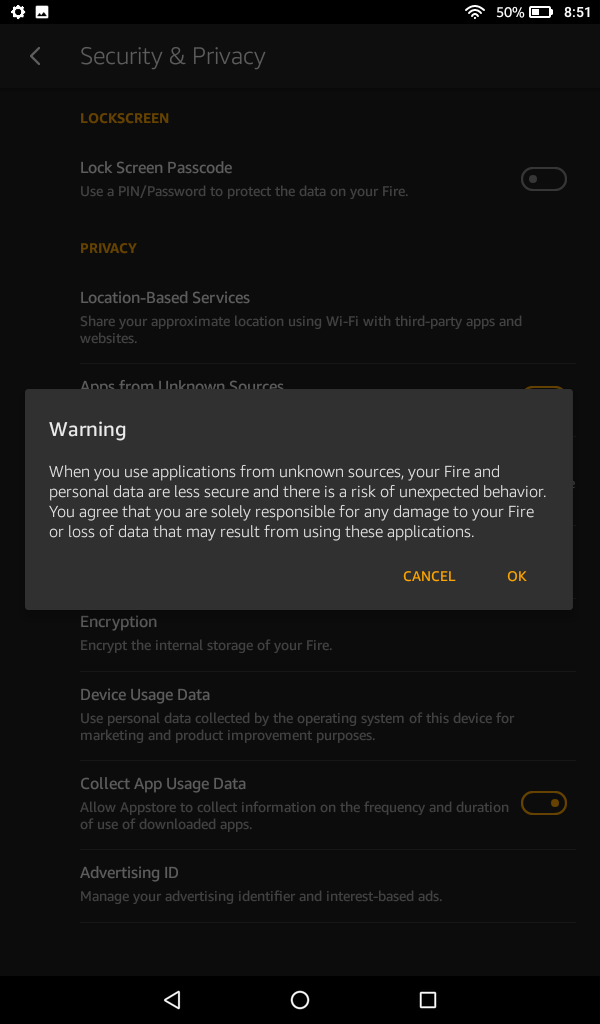
Step 1: After setting up your Amazon Fire Tablet, click the “Settings” icon located on the home screen. From there, you’ll want to click into “Security & Privacy”
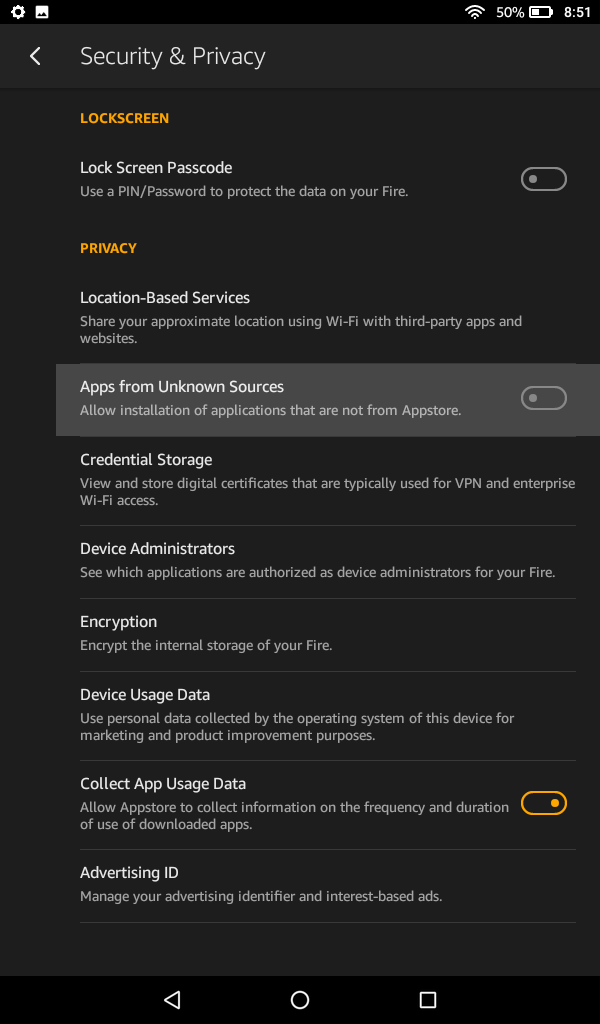
Step 2: Inside the “Security & Privacy” settings, you’ll find an option that needs to be enabled that is labeled “Apps from Unknown Sources” which allows you to download app files directly from the Internet. We will be installing the Google Play Store using this method.
Step 3: Click “OK” to the prompt that immediately follows the enabling of the security feature. This is okay.
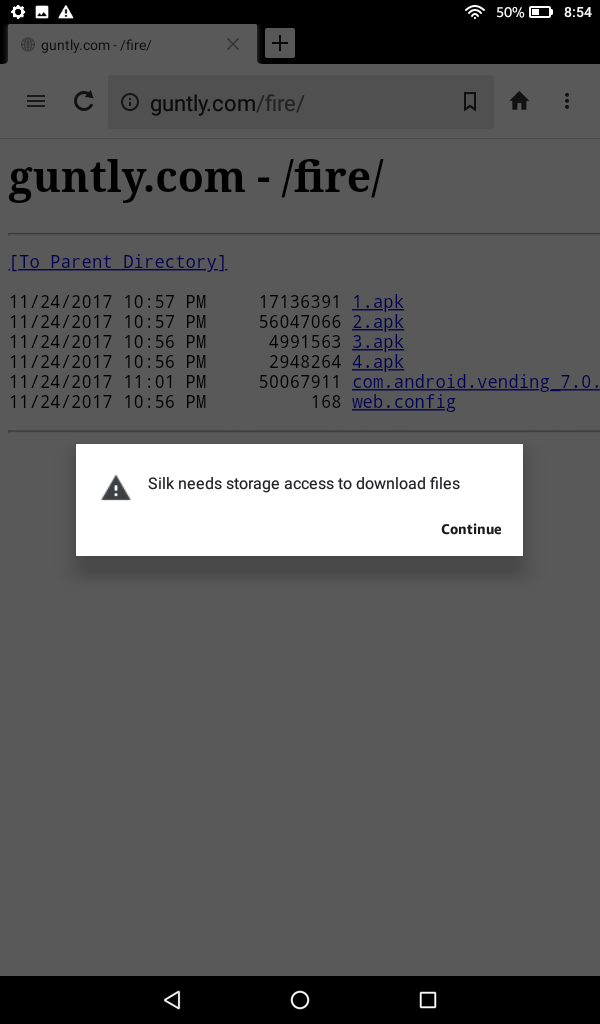
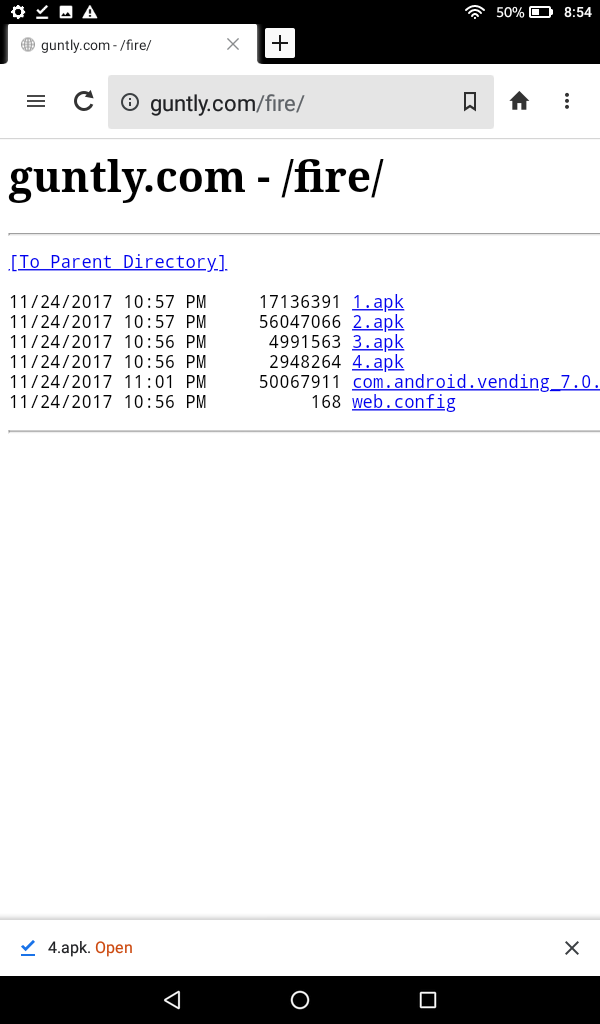
Step 4: The Google Play Store app files can be found on a number of websites, but I created my own directory to make life easier. It can be found at guntly.com/fire — The only files needed are 1,2,3, and 4.apk.
Step 5: You may be asked for storage access permissions when clicking on the download links. Click “Continue” if the box prompts.
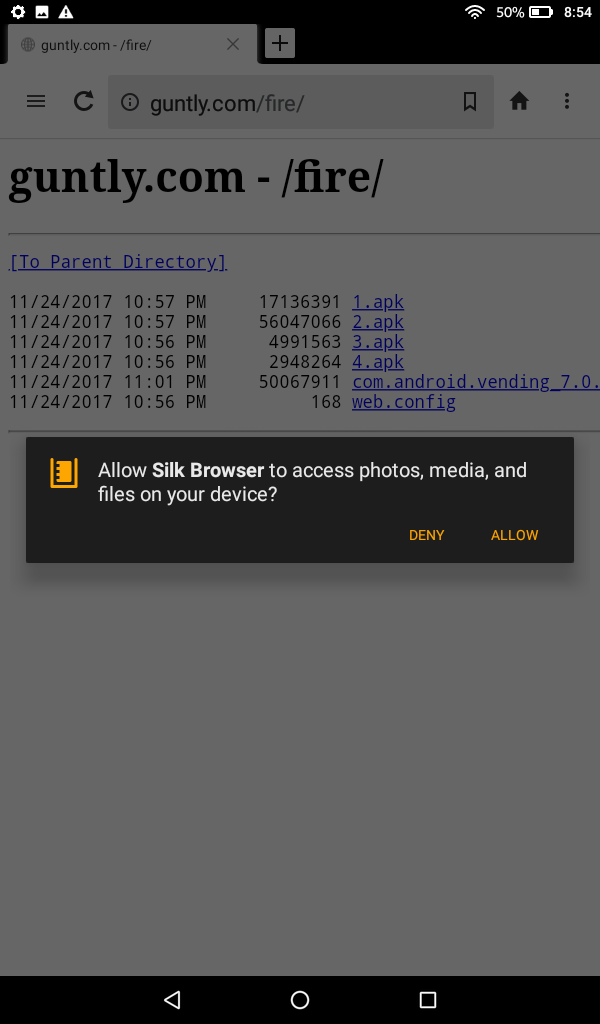
Step 6: You may also be asked to click “Allow” for Silk Browser to access the tablet’s storage. Click “Allow”
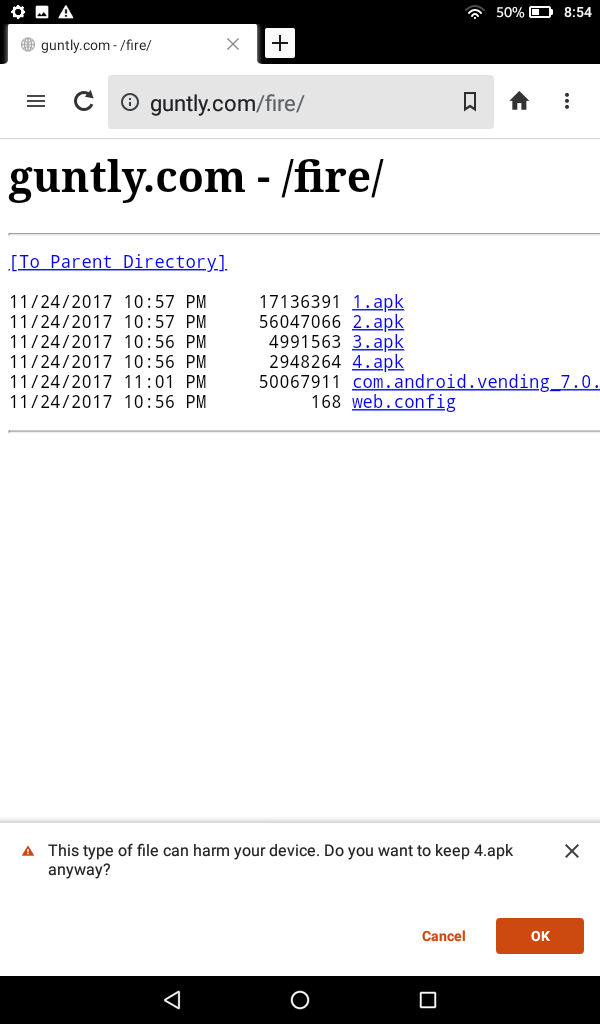
Step 7: One last file warning prompt may ask you if you want to keep the file despite its potential to harm your system. These warnings are, of course, due to the fact that we are on the wide open Internet where anything can potentially be a virus, so make sure you trust your download source.
Step 8: Individually, each file will download and, when each completes, a small “Open” link will appear. Clicking this will get you directly into the installation wizard for each file. You will be doing this four times–once per file.
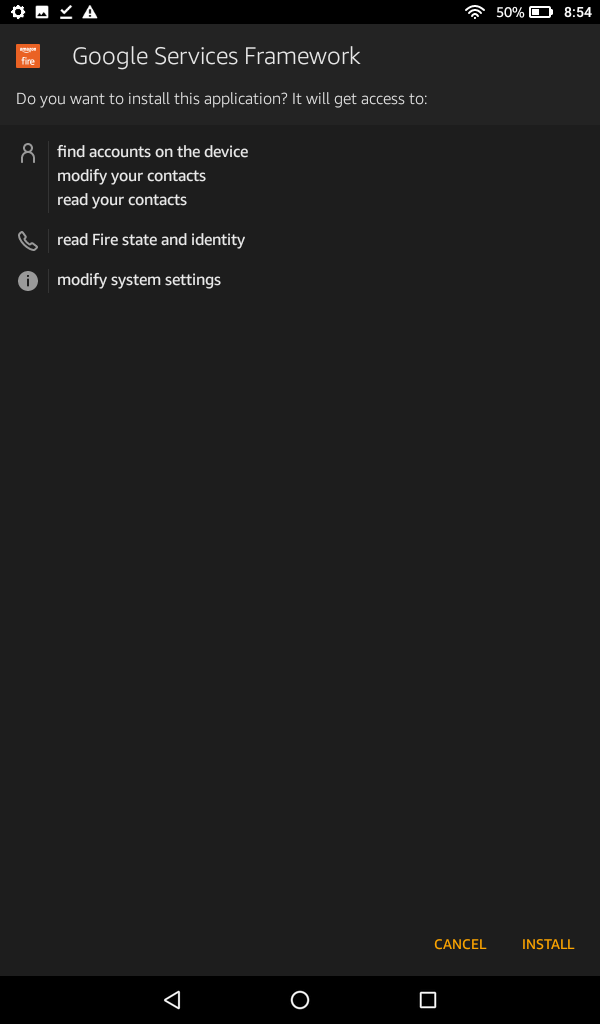
Step 9: Each file’s installation prompts are similar. Click “Install” for each prompt. and “Done” when completed to get you back to the download links.
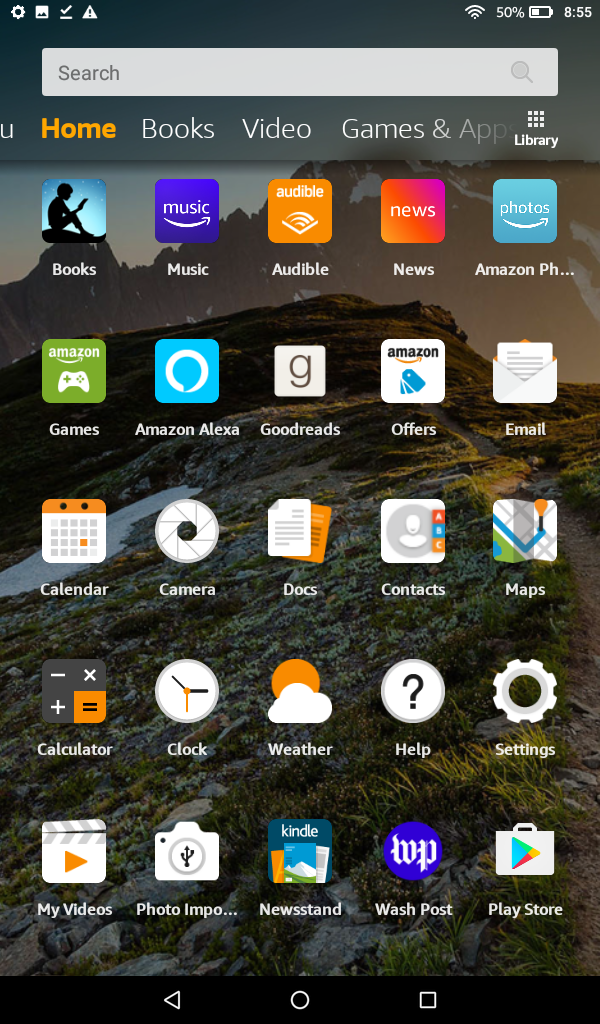
Step 10: After all four packages have been downloaded and installed, you will see Google’s Play Store on your tablet’s home screen. Click it to open.
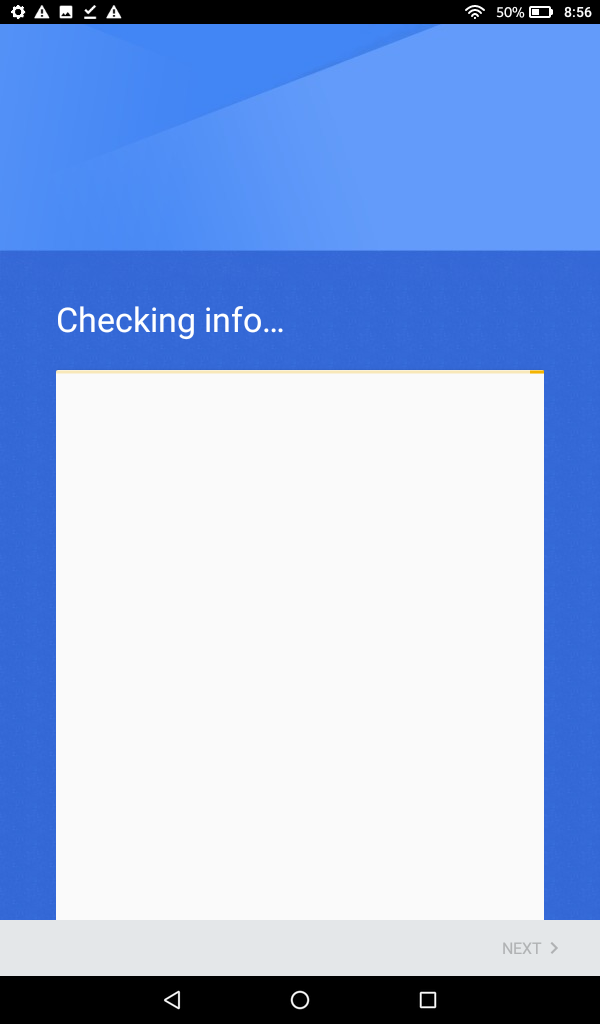
Step 11: If you see this screen and after a couple of minutes nothing is happening, or if the app crashes and does not want to proceed, simply reboot your tablet. Rebooting almost always fixes any compile/configuration issues in the back-end preventing the Play Store from opening fully.
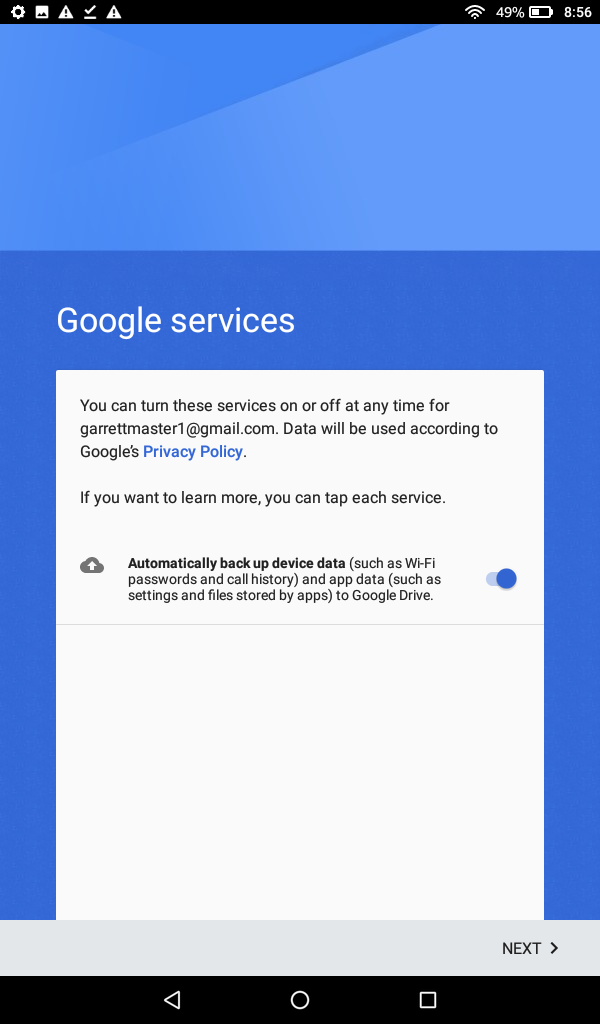
Step 12: For the purpose of this $30 tablet’s single use case, it’s generally a good idea to reduce as many background processes and tasks as possible, beginning with the prompt asking you to back up data on the Play Store. Disable this feature after logging into the Google Play Store.
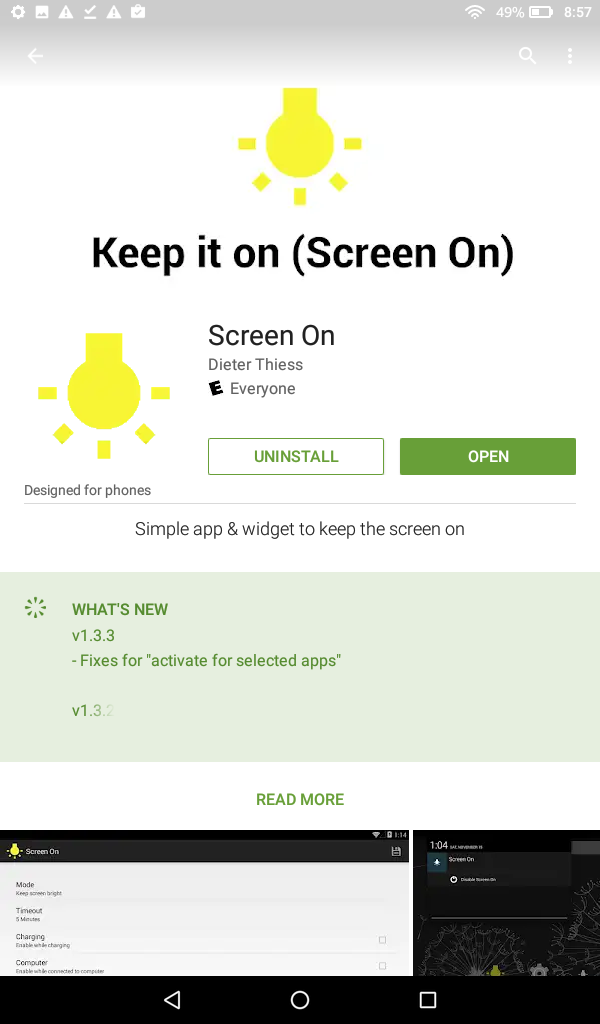
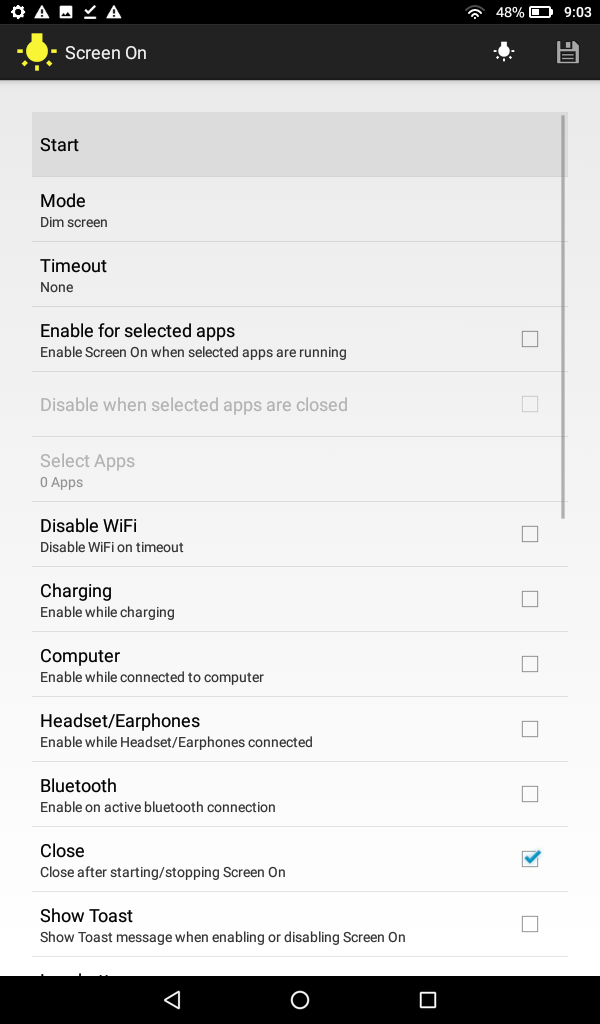
Step 13: After successfully logging into the Google Play Store, you can search for the apps you need to carry out your project to success. Personally, I rely on two main apps for most of my deployments: Screen On and Fully Kiosk. Screen On is a lightweight app that, you guessed it, keeps the screen from going dark or turning off. There is another route that involves enabling Developer Options on the tablet and enabling the “Stay Awake” feature, however I find Screen On is a more proactive watchdog.
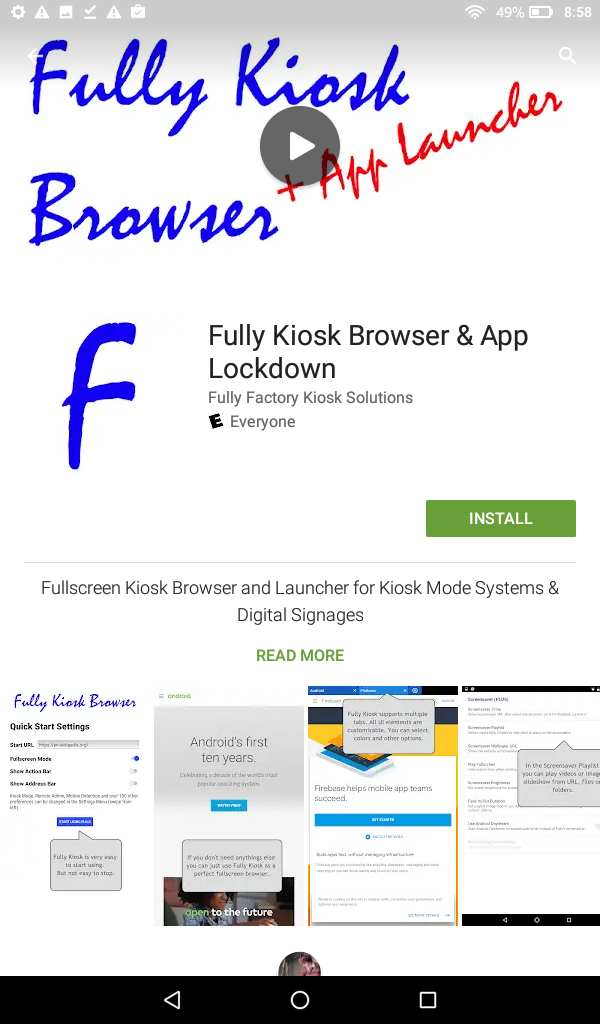
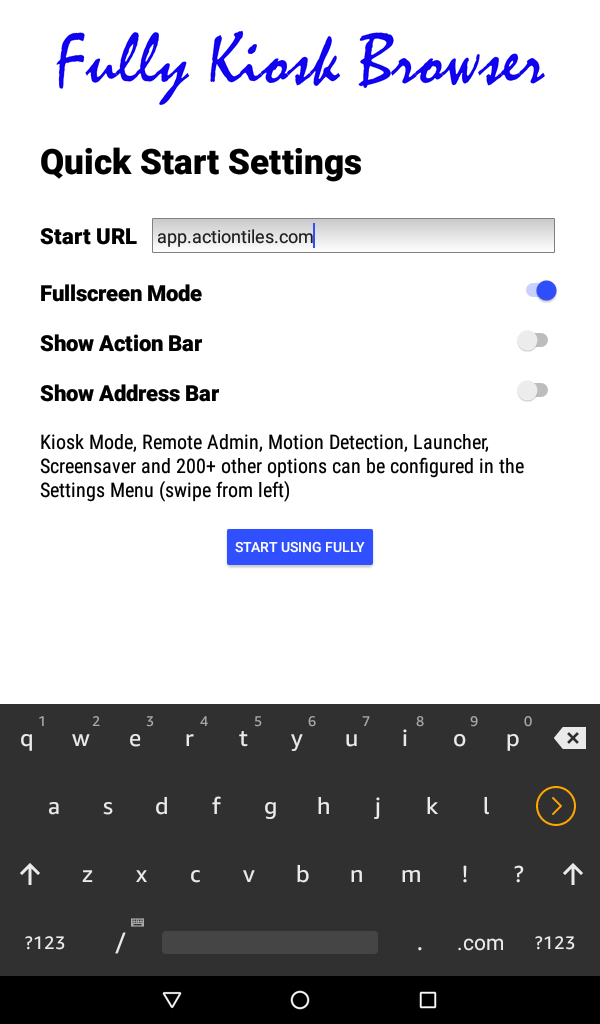
Step 14: Fully Kiosk is a hidden gem of an app that allows virtually any Android smart phone or tablet to display full screen web content without any of the status bars or other distracting interfaces to appear. This app has a number of other benefits including lock/security features as well as the ability to boot right into a specific web portal or page.
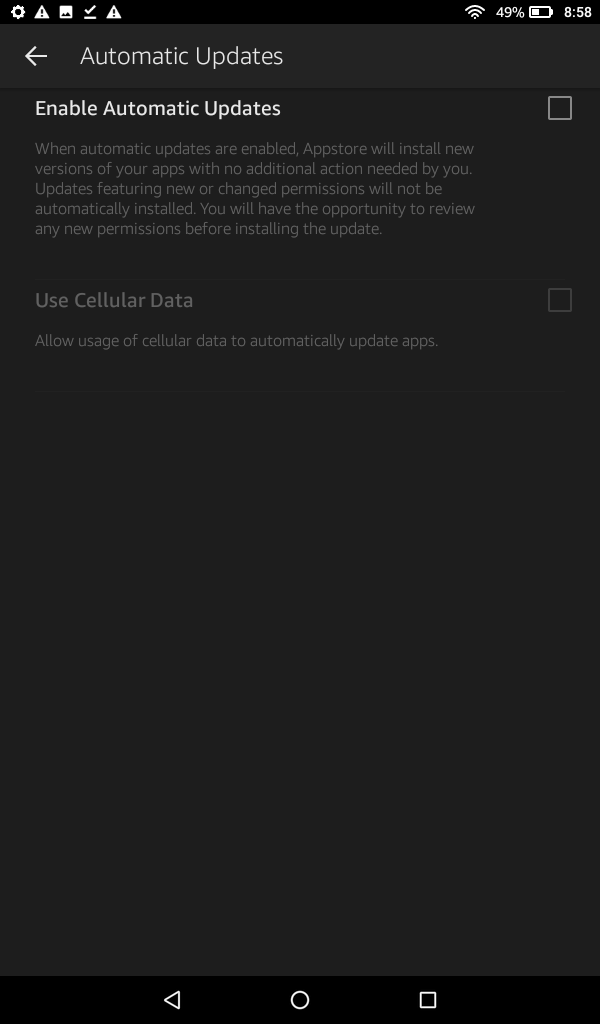
Step 15: Housekeeping Tip: In the Amazon Fire Tablet settings, disable Automatic Updates on apps to keep your project running 24/7. Amazon will still push operating system updates automatically, but this reduces background automation overhead.
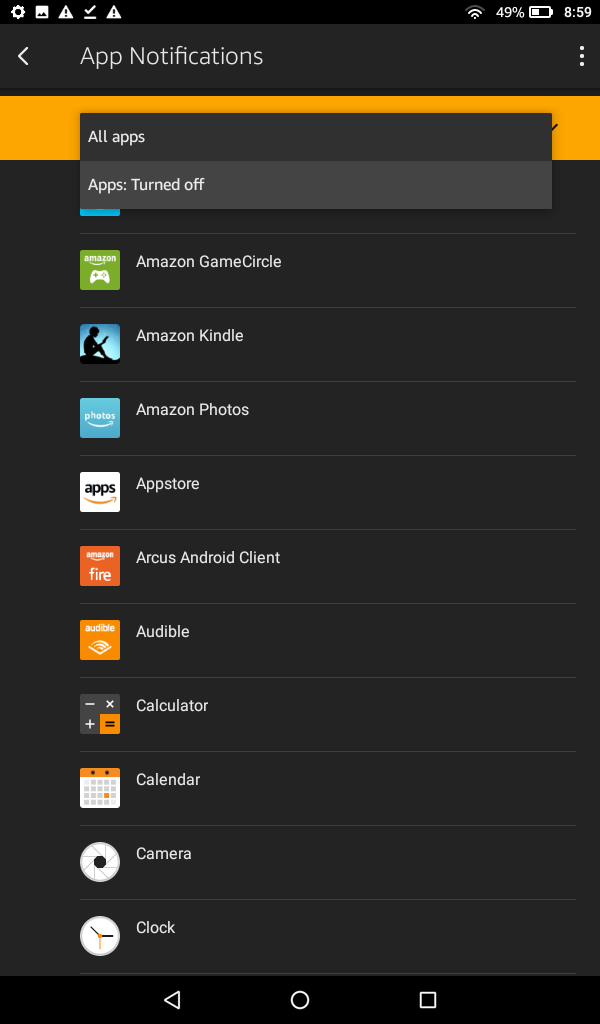
Step 16: Housekeeping Tip: Disable App notifications in the Amazon Fire Tablet settings to reduce the amount of background processes and overhead.
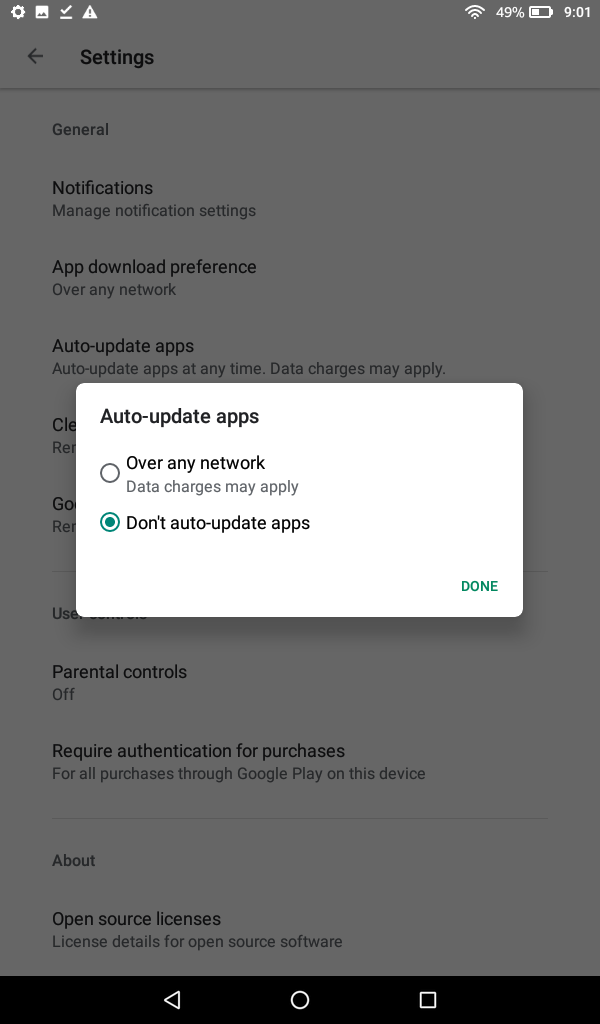
Step 17: Housekeeping Tip: Disable automatic updates in the Google Play Store’s settings which can be found by opening the Play Store and clicking on the main menu located on the upper left corner of the app.
Step 18: To use Screen On, simply open the app from the tablet’s home screen. From there, clicking the “Start” button will automatically minimize the app and you will see a little light bulb icon located on the top status bar of the tablet. Screen On has a number of handy options, so make sure to review some of the specifics that may make your project more successful.
Step 19: Fully Kiosk has a pretty simple interface, but is host to a number of premium and advanced features depending on what your project requires or where it is located. The app works by having an assigned “Home URL” which can point to your project’s direct or root directory. To exit Fully Kiosk, simply gesture swipe from the left side of the screen to the center which will reveal the main menu.